Showing posts with label midline. Show all posts

Mailbag Volume 1

Somebody say mail?


Alright, let's get this mailbag thing rolling here with the first issue!!!  We'll see how I do and keep working to improve from there.  Remember, email your questions to footballislifeblog@yahoo.com.  Ask away, if I can answer, I will!  I'm not going to use names.  I was, but I'm going to keep it impersonal, that way I can answer the questions, and not have to worry about whether or not somebody wants them posted or not.  The questions are good, and if you have them, I'm sure that another person has them as well.

Question #1 Rip/Liz

What are the two outside safeties keying for their run/pass read, in the 4-2-5, when running Saban's Rip/Liz?  Also, can you tell me the alignment for the secondary?

Answer #1
When I ran Rip/Liz (R/L) from the 4-2, I had the OSS's key the EMOL for run/pass key.  This is tough in my opinion, but keying #2 makes them a bit late to the party in some cases due to their tighter alignment that if they were a deep safety (such as the way Saban actually ran R/L).

I'll take 1 high safety please...

To the second part, the OSS's are generally inside eye of the #2 receiver, but this can vary by game plan and ability.  The corners, use standard divider rules that can be found in any Cover 3 playbook.  Generally speaking, the split of the #1 receiver is what controls the alignment of the corners.  The FS will play in the middle of the #1's, or he can favor the QB's arm, or play more to the MOF when the ball is on the hash.  The FS can really be moved around according to game plan and what your opponent is trying to attack you with.  For more on defending the spread from an eight man front, go here.

Question #2 Midline Diagrams

Do you have any diagrams of midline vs. a 4-3?

Answer#2
No need to break out the pen and paper when you've already done it right?!  Go here to check out my old article on midline.  I will expound on this a bit, as I ran the greatest running play in all of football three different ways.


Midline blast, or what some would call midline lead involved both slots attacking the B gap area.  The play side slot would fold under and help seal off the scraping LB.  In the case of the 4-3 defense, this would be the MLB.  The backside slot would go in tail motion, and then lead the QB on the keeper (if the ball was pulled), by blocking OLB to near safety.  Blast was a great power and short yardage play.

Midline seal, was the base way I ran midline, which involved the backside slot going in tail motion and leading the play, with the play side slot, loading on the front side.  The key here was seeing how the defense would react.  The reason you we ran seal was teams we would see, would pinch their DL vs. a base block, and this would thereby spill the QB outside.  Well, if you're running Blast and the QB spills outside the B gap, there's nobody there to block for him.  Seal keeps this from happening, and gives the QB a lead blocker if the play has to hit a gap wider due to stunting defensive linemen.

Midline fold, was a way to run midline with twirl motion or no motion at all.  We would run this against teams that were blitzing a LB based on our motion, or slanting and stemming the DL based on motion.  Fold had the play side slot replace the backside slot on seal.  The backside slot simple went on a pitch course, as this was the beginnings of how we installed midline triple.

Midline is a great play, and is the number one constraint play a coach must install when running a triple option oriented offense.  For more information on the flexbone, go here.

Question #3 Quarters Questions

How do you handle a boot back to a safety that has a detached #2 receiver or a one back, double tight double flanker?  How do you handle sprintout pass to a slot trips set?

Answer #3
Although a bit vague, I'll try and answer these as best I can.  Without route combos, asking a question about how a pattern read coverage handles certain routes is a bit difficult to answer.  In the first part of the first question, I'm assuming some sort of high-low type concept where #2 may be running a whip route, while #1 is clearing the zone.  In the first example I've got drawn, that is what you'll see.  The safety is caught in a bit of "no man's land" in that the whip isn't really deep enough to grab his attention.  The LB is going to be held by the fake, but must expand immediately upon reading pass.  The LB will be inside and underneath the whip route.  The safety to the side of the boot will rob curl to post, but since #1 is vacating, more than likely he'll get a drag coming from the other side of the formation.  The MLB will carry the drag until he clears the edge of the tackle box, at which time he will come off and now attack the QB and contain him on the edge.  This is where the safety must pick up the drag route.  The safety away from boot action, should "melt" into the the middle third of the field looking to work underneath the backside post.   Of course, the corner's rule of staying on top of #1 would hold true and he would run with the vertical route on the boot side, and be on top of the backside post away from the boot.  Now, I have had some calls/reactions if we were really concerned with the backside drag that had the safety away from boot, jump the route and run with it across the formation.  This is good, so long as the team you're facing doesn't run any sort of throwback concept off boot action.  The big key with beating crossing routes, is that the underneath defenders need to get these receivers on the ground.  A receiver lying flat of his back can't threaten a defense very much!


One common high-low bootleg concept that has caught on around here is booting into smash.  Same concept, but what OC's like about it is that it pulls that robbing front side safety out of the mix, opening up the drag.  This is when we like to tag our quarters coverage with something that puts the backside safety on the drag, or really harp on our underneath players getting the receivers on the ground.


None of this really changes via formation, so much as it does against route concepts.  The reads are the same no matter the formation, so the Ace Double Pro look (double TE double flanker) doesn't really change anything for the safeties.  They will still read/react off what the #2 receiver is doing.  The good news about defending the TE drag is you can utilize some concepts such as the Jam concept by Michigan State to disrupt the release of the TE, compared to when the #2 receiver is split out in the slot position.  Again, this disruption keeps the drag route from getting to the LB's before they've had a chance to come off their run read on playaction.


To answer the second question is even tougher than the first!  Again, no route concepts were given, so I'll go with your standard trips sprint out flood, where you end up with three receivers on three different levels.  Now again, what coverage are you playing, because as we all know, Quarters takes on a bit different shape when it defends 3x1 formations.   The route concepts I'm used to seeing are shown below.  The #1 receiver clears the zone, while #2 runs an out cut to the back end of the flats and the #3 receiver runs an out cut to the front end, or shallow end of the flats.  Backside is usually a drag or post.  For general purposes, I'm going to show this out of my solo check, again, keeping in mind there are several ways to play 3x1 formations out of Quarters coverage.  Anyhow, the OLB/nickel to the trips side, will expand immediately and it's important that this player work for not only width, but depth too.  The safety, will more than likely run with the out route by #2, but will be behind it due to leverage (which is why a strong side X-out concept such as TCU's Special is such a good change up vs. 3x1 flood concepts).  The OLB keeps this throwing lane narrow by getting depth and width in their drop.  The corner, of course, stays on top of #1's vertical route.  The MLB is matching #3, and will widen on the snap seeing #3 expand AND seeing the sprint out by the QB.  Once clear of the tackle box, the MLB has to go contain the QB.  The weak safety is one that is really lost in all the shuffle, especially if the offense runs the backside #1 on a drag route.  The FS should melt to the deep middle 1/3 and mirror the QB's eyes since #3 didn't threaten him vertically.  Now, if the backside #1 runs the post, the safety can help the corner with this route as it crosses the field.  The weak corner is locked up man to man with the #1 receiver, so wherever he goes, the corner is going.  The LB, away from trips, is also locked in man, but upon seeing sprint action, can now work to the sprint side and help the corner with any shallow crossing routes by the weak #1 receiver.  One thing to keep in mind with the LB away from the action, is to keep his eyes on the back.  If the back DOES NOT go with action, he needs to sit for the throwback screen.


Again, a pretty vague question, I hope I was able to answer it clearly, and I hope the illustrations help.  Please, feel free to elaborate by emailing me at footballislifeblog@yahoo.com.  Well, let's see how this goes, let me know what you think!

Duece

Flexbone-Coaching the Quarterback


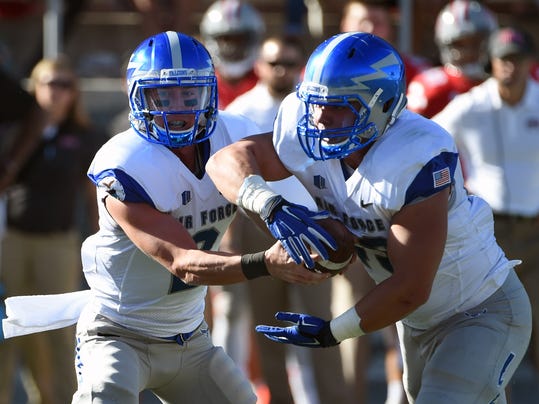
The option quarterback is really like no other position in football.  For most quarterbacks, they simply have the job of handing the football off in the run game.  The passing game is where they must make reads, sight adjustments and distribute the ball according to the defense they are seeing.  In option offenses, the quarterback must be able to distribute the ball in both the running and the passing games.  This factor makes the coaching of an option quarterback just that much more intensive to the coach.  No stone can be left unturned when teaching the mechanics of the game to the option quarterback.

To Mesh or Not to Mesh
To start, there are two distinct schools of thought in option football on how to read the handoff key (HOK).  The first, and probably one of the oldest is the famous "Ride and Decide" (R&D).  There have been many modifications to this technique over time, and every option coach you talk to has their own unique spin on this technique.  There is also the "No Mesh Mesh", or "Point Method" of reading the HOK.  Each technique has its merits, the coach has to decide what they want to teach and what they think fits their situation the best.  The pros to R&D are:

  • Very very deceptive to the defense.  It is difficult for defenders to get an accurate read on who has the football due to the length of the ride by the quarterback.
  • Slows the read down for the quarterback.  Young quarterbacks especially like the technique because it allows them feel more comfortable with the read.
On the flip side, the cons to R&D are:
  • The technique can be labor intensive to coach.  The footwork is more precise and the arm mechanics much more precise than the Point Method.
  • Turnovers.  The traditional mesh lends itself to more turnovers between the dive back and quarterback due to the ball placement and long duration that two players are in contact with the same football.
  • When pulled, the quarterback isn't always running or facing downhill.  Most who run this offense are doing so because they don't have the dominant line to block many of their opponents, so having the quarterback coming off the mesh, into the backfield can be an issue.  Many option coaches say this can't happen, but it does when using R&D, especially vs. blood stunts where the quarterback must pull the ball quickly.
The Point Method is regarded by many as a technique for the Split Back Veer (SBV) offense.  Flexbone "purists" state that it will not work when the dive back is behind the quarterback like they are in the flexbone.  This, quite simply, is not true.  The Point Method has these distinct advantages over the R&D method:
  • Simple.  It is a very simple technique to teach, and can be taught relatively quickly.  There is no "feel" involved, only the read.  The footwork is less intensive than R&D and can actually be a bit "sloppier" (for lack of a better term) than traditional R&D.  
  • Turnovers.  The Point Method leads to very few turnovers in this offense.  The reads are clear and concise and the only time there is contact between the dive back and quarterback is if the ball is going to be handed off.
In today's world of "win now", I prefer to use the Point Method.  It is generally quicker to install, takes less time to master, and is less turnover prone than R&D.  

Stance
The option quarterback should begin in a balanced stance, as shown in figure 12-1.  Since the quarterback doesn't want to tip off the defense as to the direction of the play, it is quite important to not allow them to stagger their feet in their stances.  The weight of the quarterback is balanced over a slightly narrower than shoulder-width stance.  The quarterback's head should break the belt of the center as pressure is applied in an upward force by the quarterback's arms into the groin of the center.  There are many thoughts of the positioning of the hands, but I prefer to have the quarterbacks lock thumbs to keep any separation of the hands from happening.  The most important thing is this, the quarterback should be in a comfortable position that allows them to execute their technique.

Figure 12-1 (balanced stance)

Footwork
The quarterback position, in any offense, demands time and effort put into the footwork.  The flexbone takes no exception to this rule.  The flexbone, may even be more footwork heavy of an offense compared to others.  The footwork in this offense is generally based upon whether you choose to mesh or not mesh with the dive read.  The key to teaching the footwork of the offense to the quarterback is to utilize a clock (see figure 12-2).  This way you can direct the feet of the quarterback to where they need to be headed.  When talking with the quarterback, speak in a manner such as "Step at 3 o'clock with your first step", as this will teach the player to point the toes in direction you choose.  This method aids with communication.  What you will be surprised at is how many of your kids have never studied the face of a clock!  Be sure to educate them on what you're asking them to do.

Figure 12-2 (clock used for footwork teaching)

A large component of the footwork in the flexbone offense, deals with weight transfer.  When teaching the reads such as midline and veer, the quarterback has to properly transfer the weight from one foot to another so that if the ball is pulled, the quarterback is in a position to attack the defense downhill.  Improper weight transfer leads to the quarterback "bowing" or "bending" into the backfield coming off of the mesh.  Improper footwork can lead to slow meshes as well as lost yardage on plays.  

Preferentially start with veer footwork and work from there.  For the Inside Veer (ISV), the quarterback if using R&D will step at either 3 o'clock, or 9 'o clock, depending on the direction of the play.  The weight transfer should go to the leg that steps first.  Once this step is in the ground, it is important that the quarterback get the second step down quickly.  The second step, will come down, parallel to the first.  As the quarterback meshes with the dive back the weight transfers from the back leg to the front leg.  When doing drills, make sure when the quarterback takes their steps you actually see a bit of a "lean" to them.  In other words, they should lean slightly in drills to over exaggerate this weight transfer.  Some purists of the offense teach the "hop" method of getting into position.  This method is utilized by both Navy and Georgia Tech when teaching their quarterbacks.  The method is simple, basically instead of two steps, the quarterback pushes off with the foot opposite the direction they are going (i.e. if heading right, then they push off with the left foot) and basically jumps or "hops" into the A gap in the direction of the play.  The coach, if using the hop technique will have to pay very close attention to the weight transfer of his quarterback.  What I have found when utilizing the hop is that the players like it because of its quickness to get them to the read, but tend to end up with their weight on their heels.  What this effect does is make the quarterback slower coming out of the mesh.  Care has to be made to keep them on the balls of their feet and executing the proper weight transfer.


The point method is similar to R&D but the footwork is pushed forward a bit more.  The reason for this is that Point Method quarterbacks need to make the read up into the line, rather than behind it.  On the clock, when running triple, the quarterback would step as one should drive a car; at two and ten o'clock.  This first step puts the quarterback heading "downhill" or attacking into the line of scrimmage (LOS).  The second step ends up parallel to the first.  Since there is no mesh, there is no lateral weight transfer to worry about.  All the coach needs to be sure of is that the quarterback is on the balls of his feet.  

For midline, the coach would simply do the technique listed above for R&D or Point Method and do it in reverse.  Instead of the quarterback gaining ground, they are losing ground to get out of the way of the dive back.


A key point to tell if your quarterback is going to mesh properly with their footwork is where the ball is once they've taken their first two steps.  For the triple, if the ball were dropped from the quarterback's hands once his second step hit the ground it should hit the offensive guard (OG) right in the middle of the buttocks.  As shown in Figure 12-3, this is the aiming point for the dive back.  If the ball isn't there, then adjust the steps accordingly.  This is why the use of fire hose or football tape is so imperative when teaching the offense.  The marks representing the OL can be moved to exactly match where these landmarks are to aid in teaching the proper steps.  For midline, the ball, if dropped after the second step is in the ground, would hit the center right down the middle of the buttocks.  Again, this positioning of the football is so that the dive back can run right over the top of the football and does not have to worry about adjusting his course during the play.

Figure 12-3 (Midline and Veer aiming points for the B back)

One-Way Though Process
The One-Way Thought Process is the basis for the mental training of an option quarterback.  This type of thinking can be utilized on almost EVERY read the quarterback makes.  The simplicity of the system is that the quarterback already knows what he's going to do, despite the play being an option play.  To teach this system of thought, you simply ask your quarterback, how many times they would expect to get their read right if they simply guessed.  The answer is, about 50 percent.  Of course this is in theory, and in no way am I suggestion guessing, but as the coach, you have to find a way to make the complicated read seem simple so that you slow down time for your option quarterback.  You do this, by giving him a one-way thought process, as well as giving him the idea that there is no pressure.  Furthermore, you tell the quarterback that all we expect from him, is to get half again as many as he guessed right, correct in order to be an effective option quarterback.  What this does, is tell your high school sophomore, that if he guesses, he'll be over 2/3's on his way to a good read score, and that all he has to do to get a better score is get 25% more correct.  Again, this is not suggesting he guess, but showing the quarterback that even if you guess, your at the 67 percent success rate for your overall read score of 75 percent.


The entire idea of the one-way thought process is to take pressure off of your quarterback.  In many cases this could be a JV freshman learning the offense for the first time, or a converted senior wide receiver who's never taken a snap under center.  The one-way thought process speeds up the mastery of the read in option football.  Once you have the quarterback with some confidence, you can now give him is one-way ultimatum.  This teaching should begin with the dive read on ISV.  The thought process begins by telling the quarterback, to give the football every time, unless the HOK makes a move to tackle the dive back.  The actual read is of no importance in this portion of training your quarterback.  Quite simply put, keep telling your quarterback the "give unless" statement, as many times as you can during practice.  By teaching the one-way thought process you give your quarterback a security blanket.  This is something that when the bullets are flying, he can still fall back on and rely on.  The quarterback knows what he's doing when he squares up and gets under center.

The one-way thought process transfers to all applications within the flexbone offense where the quarterback must make a read.  This process can even be utilized in the passing game.  The process can be altered as well to get the ball to certain players as well.  For instance, if a team if forcing the quarterback to keep the football, or you as the coach think that the pitch will still out leverage the defense, you can reverse the base, one-way thought process of the pitch phase.  The basic way of teaching the one-way thought process for the pitch is to run for a touchdown every time unless the pitch key (PK) steps to me.  If you as a coach, change the blocking scheme in order to get the ball pitched, you need to change the quarterback's mentality on the play as well.  Many coaches would say this is too much thinking for a young man to do, but this is simply not true as long as you use a one-way thought process.  For reversing this process, the coach might say, pitch the ball every time unless the PK steps away from you.  What this change does, is get your quarterback thinking pitch first instead of keep.  Again, nothing Earth-shattering here, you are just changing the quarterback's thought process with a simply verbal cue.

One-way thinking is the crux of proper mental training for the flexbone quarterback.  This is never more true than when dealing with young quarterbacks.  As the coach, you will be looked upon to help your quarterback out in his times of frustration or need, and the one-way thought process will be the bedrock in your teaching foundation.

Coaching the Mesh and Other Fine Points of Option Football
Once the stance, mentality and footwork have been mastered, the coach must progress to the rest of the quarterback's body to prepare them to read the option.  There are many other facets involved with coaching up the read, and these are the arms and hands, and the head and eyes.

First, is the eyes.  The head goes where the eyes go, so the coach can get a two-for-one here.  The eyes of the option quarterback must consistently be focused.  From pre-snap read to actual reading of the dive and pitch keys, the eyes are the tell-tale factor in a successful option quarterback.  Many new quarterbacks are so accustomed to looking at the ball carrier when they hand the ball off they literally have to be broken and retrained to do so by the option coach.  It is imperative that the quarterback get his eyes on the read pre-snap.  This does not, however, mean that the quarterback stroll to the LOS and stare down the read.  As the quarterback scans the offensive and defensive fronts, he must be aware of direction of play, and where the read is.  Once the quarterback has found the read, he must keep this player in his peripheral field of vision at all times.

Once the ball is snapped, the eyes must go directly to the read.  The most successful key I've ever taught is the read key's far ear hole.  What I have taught is to give the ball every time unless that far ear hole makes a move to take the dive back.  Again you can see the one-way thought process being utilized, but now being taught with the read.  If the read key does anything other than tackle the dive back, the quarterback will give the football.


The eyes aren't just coached in the dive phase of the triple option either.  The pitch phase is just as important on the eyes as is the dive phase.  Once the quarterback has pulled the football, and is now attacking the option alley, he must find his PK.  Again, this should have been determined pre-snap, but the coach can have some freedom in setting these reads, which will be discussed at length in a later segment.  As the quarterback accelerates into the alley, and the PK is locked on to, the one-way thought process enters the quarterback's mind.  The quarterback, initially, should be taught to keep the ball every time unless the PK steps to take the quarterback.  The eyes here are important, because in the beginning you want the quarterback to find the near shoulder of his read.  As he accelerates toward the read, the focus should now move to the read's feet.  If the feet settle, or turn and attack the quarterback, that is when the ball should be pitched.  What the coach's goal here is, for the quarterback to see both the shoulder and the feet at the same time.  A simple pitch drill involving a pitch back, and a read go a long in teaching this simple process.


Many coaches don't master the hands of a triple option quarterback, only to pay the price in the end with turnovers and sloppy play.  When installing an option offense, the hands are the tools that deliver the football, whether it be handing the ball to the B back in the dive phase, or pitching the football.  Improper hand placement is the number one cause of turnovers within the flexbone offense.

When the quarterback takes the snap from center, if meshing, the ball should be slightly seated in a manner to allow the center to clear the quarterback's hands.  This does not mean that the quarterback brings the ball back into his body in the traditional sense of seating the football.  What it means, for the option quarterback is a simple shortening of the length of the arms by bending the arms, only slightly, at the elbow.  Once the steps are made, the arm work for the various methods of meshing are a bit different, and both will be discussed.

If meshing, the arms should extend back, much the way a baseball hitter would begin to draw the bat back, prior to swinging at a pitch.  The arms are locked, but not rigid.  The ball should be in both hands of the quarterback, with the full contact of the palm of each hand on the ball.  An important note here is that the position of the laces does not matter for the mesh.  As the quarterback is taking his steps, and swinging the ball back, the eyes go to the read.  The ball, should never be swung any further back than the quarterback's deepest hip.  In other words, if running triple to the right, the quarterback should not swing the ball back any further than their right hip.  As contact with the B back is made, the quarterback should apply no pressure to the B back's midsection.  The quarterback's arms should move in succession with the movement of the B back, as the quarterback is making the read.  If a give read is made, the quarterback should stiffen the upfield arm and apply pressure to the midsection of the dive back, thereby seating the football into the pocket of the back.  The back hand, or off hand comes off the ball first, followed by the front had.  The front hand is the most important hand, as the quarterback should maintain pressure all the way through mesh, until the B back has cleared the quarterback's front side hip.  If a pull read is made, the quarterback applies no pressure at all to the dive back, and will re seat the football back into the midsection of the quarterback, keeping the ball from interfering with the path of the B back.  Once the B back has cleared the quarterback the ball will be raised from the midsection of the quarterback to right in front of the chest around the top of the numbers on the quarterback's jersey.


If not meshing, the technique is a bit simpler to teach.  Once the first steps are made, the quarterback will actually, physically point the football at the read key.  The quarterback should look right down their forearms and focus on the read as shown in Figure 12-4.  If the HOK gives a handoff read, then the quarterback stiffens the front arm as the dive back runs over the top of the football.  If the quarterback gets a pull read, the ball is quickly reseated into the midsection and the same manner as meshing is used to move on the pitch phase of the triple option.  An important coaching point in teaching the Point Method is this.  If the dive back feels the football, he is to take it.  If the quarterback feels the dive back he is to give it.  This technique, does reduce the overall deception of the play a bit, but reduces the potential for turnovers in the mesh.  Turnovers must be minimized, there are ways around the play not being as deceptive.

Figure 12-4 (focusing on the read)

When pitching the football, there are numerous methods of getting this task accomplished.  The most important factor is quarterback comfort.  Most quarterback's, especially young ones, have a fear of parting with the football, especially if it involves reading and pitching.  The quarterback, has to be comfortable in what he's doing in order to effectively master the offense.  Players that have small hands, should use what is known as a basketball pitch.  As the quarterback attacks the pitch key and gets a pitch read, they will roll the ball over in a manner that resembles a basketball player taking a shot (Figure 12-5).  For instance, running triple to the right, the quarterback would roll the ball left so that his right hand was now facing outward (remember the ball is at the quarterback's chest in all of this).  The off hand is just like the shooter's hand in basketball.  The hand is there merely for support and as a guide.  The quarterback should step in the direction of the pitch back, and then flick the wrist and hand in a manner to spin the ball, much like a kickoff would look.  What this does is create an end-over-end pitch that is soft and easy for the pitch back to handle.  The reason smaller handed players should use this method is the control they have over the football when doing so.

Figure 12-5 (shooter's hands)

If the player has sufficiently sized hands, the coach can teach a more traditional method of pitching the football.  This method, again begins with the football at the quarterback's chest.  As per Figure 12-6, the hands, however, are placed higher than if doing the basketball pitch.  The hands should be in the upper 1/3 of the football near the where the stripe is on many footballs.  This landmark can vary due to hand size, but the hands must be on the upper 1/2 of the football.  As the quarterback makes his pitch read, he will step in the direction of the pitch, releasing the ball with his off hand (in our example of running triple to the right, this would be the quarterback's left hand) and extend his arm nearest the pitch back.  The quarterback should push outward from his chest and at full extension of the arm, flick the wrist, so that the thumb ends up pointing downward. The method of pointing the thumb gets the ball rotating similar to the basketball pitch, much in the same manner as a kickoff.

Figure 12-6 (traditional hand placement)

When pitching, the arm nearest the pitch back should always end up being pointed in the direction of the pitch back (see Figure 12-7).  Thing of a shooter in basketball following through with his shot.  The shooting hand would end up pointing to the basket.  This is exactly the same for the quarterback's pitch hand.  Lack of this technique is easy to spot, because the direction of the pitch will be off target.

Figure 12-7 (pitching the football)

Another key component of teaching the pitch is teaching protection.  Defensive coordinators (DC's) are generally on high aggravation having only a week of preparation for an offense they rarely see, so one of their finer coaching points is to hit the quarterback on every option play.  The option quarterback must know he's a marked man from the get-go, and you as the coach, must teach him how to effectively protect himself.  When pitching, this all comes back to the footwork on the quarterback.  As the quarterback takes his step to the pitch back and pitches the football, he should, follow through with his second step and turn away from the attacking pitch key.  What ends up happening is the quarterback runs a sort of semi-circle that keeps him from a truly devastating blow by an unblocked defender.  Even if contact is made, the quarterback is protected because he's moving with the defender instead of against the defender.  Every effort should be made to teach this method of protection because losing the quarterback to injury is a blow to any offense.

Some of the finer points in coaching the triple option when dealing with a quarterback is to preach axioms.  These are as follows:

  1. Better a wrong read, than a long read
  2. Give the ball every time unless (one-way thought process)
  3. Keep the ball every time unless (one-way though process)
  4. When in doubt, give the football
  5. Pitch the ball heart to heart (your heart to the pitch back's heart)
  6. Never pitch in a mess, never pitch in distress
The first one is stolen from triple option coaching great, and father of the Triple Gun Offense, Tony DeMeo.  DeMeo, though not a mesh purist, nor a Point Method advocate, had his own unique way of teaching the mesh.  He taught his quarterbacks that it was better to have read wrong, than to be stuck in the backfield with a long read.  This is a very true point.  One of the top reasons coaches move to the flexbone offense is the fact that they lack talent and size along their offensive lines.  No reason to ask the those guys to block any longer than they have to.  Also, the longer the ball is in the mesh, the more potential there is for trouble, such as fumbles.


The next two axioms have already been discussed at length.  The key element here, repetition.  The quarterback must know these and hear these two daily.  These two statements build trust in the system as well as building confidence in your quarterback.

Number four, is very similar to the one-way thought process, but it's your quarterback's get out of jail free card.  When the chips are down, and he seems confused, he should fall back on this axiom.  You as a coach can help him out by adjusting line splits, or changing the read for him, but the quarterback should always know what to do, even if he doesn't know what to do.  Again, this axiom if for building confidence.

Five is a technical aspect that must be harped upon, by the coach, once the pitch phase of the triple option has been installed.  The idea here is that the football stay elevated and have a landmark to be pitched to.  The proper placement of the football for the quarterback is in front of the chest, as he attacks the PK.  This positioning allows for the quarterback to pitch the ball effectively, as well as protect the football in event of a misread.  When teaching the pitch drill, repeat this to your quarterback and even better yet, have them repeat it back to you.

The last axiom is one that involves taking care of the football.  We've all seen that option quarterback who, at the last minute, while being tackled, pitches the football to a pitch back who may scamper for a touchdown.  Sure, while these make great highlight reels, they are certainly not the norm and are an unnecessary risk.  The quarterback, if he feels unnecessary pressure, or finds himself in a misread, should NOT pitch the football.  Instead the quarterback is to turn into the LOS and gain what yardage he can gain.

Option Drills and Progression
The first drill I start teaching to my quarterbacks is the footwork drill.  No matter what you use, whether it be point method, R&D, hop, the feet are the most important component in your quarterback having success running the flexbone offense.  Preferably start with stances, being sure the quarterback has a flat back, and a balanced stance as shown in Figure 12-8.

Figure 12-8 (Quarterback Stance)

From the stance, progress into the first step of the ISV play.  Teach the quarterback the step, then add in the arms.  If R&D is your choice, the arms should swing to the back hip.  If doing point, the arms should extend and point at the HOK.  Next add in the eyes.  What I prefer to do is have myself positioned as the read, and hold up a number on the snap, having the quarterback tell me the number.  This gets the quarterbacks comfortable with  not looking back at the running back.  From here, add in the second step and begin to work on weight transfer.  It is important that in this part of the teaching process you are not adding a running back to the drills!  I cannot stress this enough.  Teach small, and think big, but be sure to start by teaching small.  From this point, you can now progress to accelerating off the mesh into the pitch phase.

Once the quarterbacks feel comfortable with the steps and eye progression, you can then add in the dive back in a drill I like to call mesh drill.  I start mesh drill off by having the old standard fire hose with the OL alignments at their correct distances as they should be in a game situation.  Add in the dive back and simply tell the quarterback to give the football and get his eyes on the read.  The read key doesn't need to do anything at this point but give the quarterback a landmark for his eyes to go to.  As the coach, you are looking for the quarterback to have proper eye placement and steps.  It is important that you understand you are not reading in this part of the drill yet.  As the quarterbacks become comfortable fitting with the B backs, then you may add the read.  I usually get another coach to stand in as the read, holding a square hand shield, like the one in Figure 12-9.  I teach that the top of the pad imitates the head of the read key.  In the beginning I start off by telling the quarterback what the read will be.  Again, remember, many of you will be teaching a spread quarterback who has spent his entire football career in the shotgun up until now, or a pro style quarterback who has simple reversed out and handed the ball off.  You, the coach, the teacher, have to break these habits and teach this young man something out of their comfort zone.  Give your quarterback the various reads, telling him each time the response you want him to give you.  From here the drill can progress on into actually making the reads.  The coach playing the read key will need the hand shield because they are going to be actively involved in attacking the B back, so they need to be protected.  If you cannot do this, the drill will not look even remotely the same as it does in live action.  

Once the mesh drill is coming along the quarterback should progress to pitching the football.  There are a couple of simple drills for pitching the football shown in Figure 12-9 and 12-10.  The first pitch drill can be done in a pre-practice type setting and can be done with either a painted circle on the field or using the defensive linemen's pass rush hoops.  The quarterbacks will simply job in a circle pitch the football to each other.  Preach the axiom of pitching  heart-to-heart and not pitching in distress as the quarterbacks go through the drill.  It is important that the quarterbacks constantly hear the coach repeating these axioms.  

Figure 12-9 (Circle Pitch Drill)

Figure 12-10 (Yard Line Pitch Drill)

The second pitch drill can be done on a field with lines.  The quarterbacks start out on a line and begin by jogging across the field width-wise.  The quarterbacks will pitch the football at each other, again, following the careful instructions of the coach.  The idea here is to start slow, at a light jog and progress into a game speed pitch.  

Another pitch drill that does not involve as much movement is having the quarterback come down the line and step and pitch.  This can be done on the fire hose and either having another player, coach, or even an empty trash can for the quarterback to pitch into.  Here the coach can also work on the quarterback stepping into the pitch, and protecting themselves from an aggressive PK.

Once pitching and the dive read have been implemented through drill work, the coach should then progress to Veer Drill (see Figure 12-11).  Veer drill is done on the fire hose and must have two defenders present.  These defenders can simply be coaches or extra players.  The drill is not live, but the HOK should have a hand shield so that they can aggressively play the part of the dive read.  Again, start with telling the quarterback how the play will unfold for their first few repetitions, then progressing into the quarterback having to read the entire play.  Veer drill adds in the slotbacks for the pitch phase.  Here the running back's coach should be added to aid in helping the slots keep proper pitch relationship as well as motion timing.  Veer drill will and should become an everyday drill (EDD) that the option coach uses during the season.  I have had years in which this drill was run in shorts and helmets in pre-practice on Thursdays prior to a Friday night game.  The more repetitions the better.  The coach should mix the read up as the quarterbacks begin to show proficiency at reading.  Work the stunts that the quarterback must master, and work them daily because even though you may think you're opponent will play you one way, you must prepare your quarterback to be ready for anything.

Figure 12-11 (Veer Drill)

As the quarterbacks and running backs become more and more comfortable within the offense, it's now time to add in the offensive line.  A preferred drill among option coaches is that of half line.  Half line works the play side of the offensive line and allows the option coach to effectively double their repetitions of the option.  In half line, make up defenses if you have to, put them up against even fronts one play and odd fronts the next.  For the quarterback coach, the idea here is to make sure that pre-snap the quarterback is finding the HOK and the PK.  From there, the quarterback needs to take the proper footwork, and execute a proper reading of all phases of the triple option.  

Mesh drill, veer drill and half line can also be used to work on other run plays as well.  These may or may not be option plays.  Midline is another play that should be drilled when running these drills, but not until the ISV has been effectively installed.  


Other Quarterback Mechanics in the Flexbone Offense
The quarterback in any offense must master handing off the football on non-read plays, passing footwork as well as master audibles and helping get the offense in the right play when necessary.  Some of this I will not go into great length in discussing due to the fact that there are already so many good texts out there on the subject.  One aspect the flexbone coach 
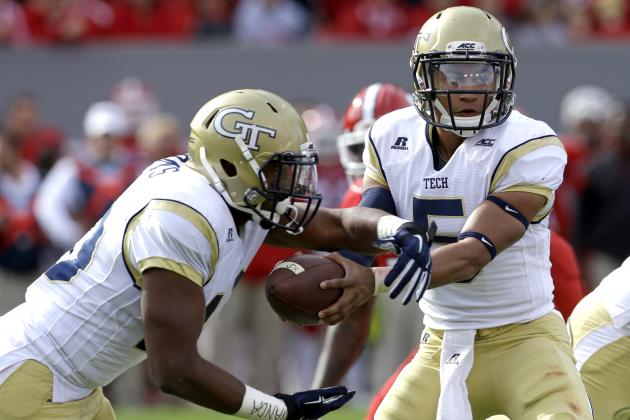
must understand, is that some of these skills will not be as hones or polished as a prototypical quarterback due to the nature of the quarterback having to master the reads in the triple option.  This is the sort of give-take nature of the offense.  Sure, the OL don't have to block certain players, but the trade off is, you're not going to find yourself with a great, polished pocket passer in the process.  This can be seen on many a Saturday watching some of the service academies, or Georgia Tech even, and those coaches get to spend much more time with their quarterback than the average high school coach does.  It is up to the coach to choose wisely what other concepts they want to put into the offense.  Sure we'd all love to have 25 passing concepts in our playbook, to go along with 40 running plays, but the simple fact of the matter is that this will not happen in the flexbone offense.

Teaching the Passing Game
I will not go at length to discuss this, but to expound on the one-way thought process and how it can be utilized in teaching the passing game to your option quarterback.  The one-way thought process allows the quarterback coach to be able to simplify the passing game so as to teach the quarterback a simply way of delivering the football based on a quick read.  Now, you are not going to get two reads on one passing play.  I'm telling you, this is too much to give most quarterbacks in high school, much less one who has to learn to read the midline and triple options as well.  A simple way of teaching your passing reads, though, goes right along with the one-way thought process.  This process is quite simply done by using one-way thinking on all pass plays.  For instance, looking at Veer Pass in Figure 12-12, the quarterback is to read the flat defender.  Teach the quarterback a one-way thought process here.  What's brilliant about the one-way thought process is that it allows you the coach to control the thinking and reacting of your quarterback.  For instance, if you prefer to get the ball to your slots in the passing game, then give the quarterback a one way thought process of "I'm going to fake the ball to the B back and throw to the play side slotback every time unless the flat defender sinks on the snap, to which I will throw the swing route to the pitch back".  Again, a one-way thought process that works.  The quarterback, who by the time you install the passing game, should be accustomed to finding his pre-snap read, can identify who the flat defender is (usually the PK) and now has a means to react to this players reactions.  Like I stated earlier, I'm not going into grave detail on the passing game, there are far too many resources available to the coach to teach the passing game to add to this text.

Figure 12-12 (Veer Pass)

Teaching Pre-Snap Reads and Audibles
The option quarterback, once comfortable in the offense, must begin to take on the role of coach and coordinator on the field.  The commander-in-chief, must be able to get the offense out of a bad play.  Many quarterbacks in today's game call their own plays, and then change those two and three times at the LOS.  The flexbone offense, need not to be that complex, but there will be times in which a savvy DC may gain the upper hand by front or coverage.  The option quarterback must know how to get the offense out of a bad situation without using a timeout.  The idea here, for the option coach, is to progress beyond the how's of the offense, and on to the why's.  Some quarterbacks get the why's, but others need time to progress and understand the method to the madness that they asked to operate week in and week out.

One simple way to teach option quarterbacks audibles is a two word thought technique, known as cloudy and clear.  What these terms refer to is the gap being attacked by the offense.  For instance, in Figure 12-13, the defense is employing the standard over front look from the 4-4 defense.  To one side of the offense the defense is presenting a three technique and a five technique, while to the other there is a one technique, or shade and a five technique.  The cloudy and clear, for ISV would refer to whether or not the gap being attacked (B gap on ISV) is open or closed.  The offense can be run to a three technique, but it is a bit more difficult than running it to an open gap.  Some of the thoughts for the coach are, do you want to change the play to the better gap, or change the play altogether.

Figure 12-14 (4-4 vs. Flexbone)

Changing the play to the better side, is a simple, safe way to have the quarterback flip the play to the better gap.  A simple opposite call from the quarterback will alert the offense that the direction of the original play has been changed to its opposite.  There is an issue with this thinking though.  Simplicity, comes with a price.  Good DC's will play this offense with field and boundary personnel, and will generally play a three technique to the wide side of the field.  This forces the opposite call to be run back into the boundary, which in high school football can provide a very small area in which the offense must operate.  With this in mind, the coach may want to use an alternate method of getting themselves into a better play, that involves changing the initial play altogether.

Again, teaching cloudy and clear, or open and closed (merely an nuance, you may call it what you like) as well as the theory of the offense to the quarterback will allow them to understand that triple into the boundary still isn't as good of a play as midline to a three technique is.  From here, the experienced quarterback can put the offense into the proper play with the proper amount of space in which to run said play.  Now, the rest of the offense must be able to understand and grasp this concept or you'll end up with only a percentage of players being on the same page as the quarterback.  It does the offense no good for the only the quarterback to know what they are doing.  If a majority of the offense cannot adjust, then the first method of audibling is a sound way of doing things until the younger, less experienced players catch up.  No matter what, the quarterback must be able to read defenses pre-snap to determine in what direction they should run the called play, or if they should run another play that supports the play that was called.  All of this, is of course, based on the coach's game plan to attack his opponent.

Final Thoughts Regarding Coaching the Option Quarterback
In conclusion, the number one priority for the quarterback's coach is to get the quarterbacks to be comfortable with what they are doing.  Build confidence in your option quarterbacks.  Many may have leadership traits, but one must remember, they are 15, 16, and 17 year-old's and their minds are running wide open about many things other than football.  Berating, yelling at, or demeaning a quarterback, or any player for that matter, is counterproductive.  The option quarterback must be treated with great care.  If handled too tensely, it can lead to quarterbacks who are afraid to make a mistake, afraid to trust their reads, and unable to perform their duties of distributing the football to the proper players.  Being too loose with the option quarterback can give a false sense of confidence and allow for bad habits, that lead to selfish play, and potentially turnovers.  The option quarterback must understand that they are the point guard on the football field.  Ready, at a moments notice, to take the game winning shot, or dish the ball off to an unguarded player.


When coaching this player, the coach should always speak in an authoritative tone, but also show understanding.  Realizing that many of these players have no idea about option football.  Always start from the ground up, stressing footwork and stance first and foremost.  Work the mind of the option quarterback constantly.  Talk to him in axioms, make the quarterback recite the axioms so they remember them second-nature.  When a mistake is made, always ask what the quarterback saw.  Don't tell him he made a misread, simply ask him what he saw, then tell him what you saw and correct accordingly.  Praise, praise, praise!  When your quarterback does something correctly, let him and his teammates know about it.  Remember, lift up your quarterback, don't tear him down.  Lastly, make it fun!  Football, even at it's highest level, is still a game.  Even tonight, while watching Celebrity Jeopardy, Aaron Rodgers, the quarterback of the Green Bay Packers said this very thing.  It's only a game, go have fun, and read em' and run!

Flexbone- Coaching the Offensive Line


The offensive line in any offense is the most important part, and the Flexbone is of no exception.  Properly training the offensive line in the techniques needed to block defenses is paramount to any coach interested in running the Flexbone offense. 
       The flexbone offensive line is made up of five players with varying uniqueness to their positions.  The center, by far, should be the best offensive lineman of the five.  The reason for this is that the center may be called upon to block a noseguard by themselves, which is a tough task, especially with having to snap the football.  The guards are the larger, more physically imposing, and stronger of all the linemen.  The guards need to be able to move players aligned directly over them, but still be athletic enough to pull and trap or lead up on plays such as the Rocket Toss.  The offensive tackles would most likely be tight ends or H-backs in other offensive styles.  The tackles need to be athletic enough to block on the second and third levels off the offense, however they must also be decent enough of a lineman to block a defensive end or help out on a double or triple team block with the offensive guards.

Stance
The major difference in the offensive line, in say a pro-style offense versus the Flexbone is the stance.  When looking at typical offenses the offensive linemen (OL) are allowed to have their buttocks’ lower and their chests more upright as they want to read and react to a defender’s movement.  The Flexbone is not a reactive offense, yet it is a proactive offense that attacks the defense before the defense knows what has hit it.  The stance of the OL in the Flexbone is one where the buttocks is higher than the head and is more of a traditional sprinter’s stance. 
       To start, the OL should have their feet no wider than shoulder width apart.  By utilizing this framework the OL can move laterally as quickly as they can forward.  The OL wants to have at least a 60 percent to 40 percent weight ratio of weight on their down hand versus weight on their feet.  If this is a problem, the OL is recommended to utilize a four point stance (both hands on the ground instead of one).  This weight ratio, ideally, should be in the 70 percent on the down hand, and 30 percent on the balls of the OL’s feet.  The weight ratio described is one that sets the Flexbone OL apart from many other offenses, because of so much weight forward.  The idea behind this technique is again, that of a sprinter.  The OL, in the Flexbone, want to knock a hole in the defense, not react to the defense’s movement and get in their way.  The OL’s back should be flat with the buttocks rising slightly above the level of their helmet (as shown in Figure 10-1).  The down hand should be out in front of the facemask with the appropriate weight placement.  A good test is to take and slap the OL’s hand and see if he rocks forward.  If the player falls forward at a steady rate then there is plenty of weight on the down hand.  If the player does not fall forward, then the player needs to put more weight on the down hand.  If the player falls rapidly forward, then the weight needs to be adjusted back from the down hand and transferred to the balls of the feet.


Figure 10-1 (Basic stance)


Footwork
In all of football there is no greater component to success than footwork.  More football players are defeated in their first step than in any other progression of their footwork.  The offensive line is no different, in that the first initial step is as critical as it is to any other position on the field. 
       The first step, or initial step, for the offensive linemen is a six-inch power step.  This step, should be in the direction of the play, and should be a step that gains ground into the defense.  The chest should not elevate on the first step, yet should stay centered over the lineman's center of gravity, or be slightly forward.  The hands should come from their normal position and move to that in a ready-to-punch motion (figure 10-2).  The head and eyes should be focused on the aiming point, depending on the type and direction of the block.  This first step, if too long in stride, will cause the offensive lineman to become off balance, and they will thereby lose power in their striking ability, or ability to adjust to the defender's movement.  If the initial step is too short, then the lineman cannot get to his aiming point before the defender has reacted, making the block that much more difficult to control.  This initial step is the most crucial part of the blocking process and must be conditioned through countless repetitions.

Figure 10-2 (Hand placement)

       The steps an offensive lineman will take will vary depending on the type of block that is being made.  For instance, a lineman on the front side of a play, executing a base block, will take a more forward and direct step attacking their landmark.  On the backside of an offensive play, if the lineman is scoop blocking, then the initial step will be much flatter, as the angle of attack by the offensive lineman is much greater when they are attempting to cut off any backside pursuit.  No matter the type of block, the initial step, cannot be too large or too small, or the block will surely fail, leading to the demise of the integrity of the play.

Types of Blocks in the Flexbone Offense
  The types of blocks in the flexbone offense vary depending on whether or not the offensive lineman is on the play side or the backside of the play.  Technique may vary, but the goal is the same for any of these types of blocks, stop the defender from gaining an advantage over the offense by stopping his initial charge and then moving him in a direction that gains the offense yardage by reestablishing the line of scrimmage.
Play Side Blocks
       Play side blocks are of the following types:
Base
Veer
Loop
Scoop or Zone
Double/Triple Team
Fan
Pulling

A base block is simply as the term implies, basic. What this means is that the offensive lineman will be attacking a defender, with either inside or outside leverage, depending on the direction of the play, and will be attempting to lock on to the defender and stay engaged in the block for the duration of the play.  The base rule for a player having to execute a base block is to check outside, on, over, inside when looking for who to block.  Once the assignment is calculated by the lineman, then they will step with the play side foot and engage the near shoulder of the defender.  This defender, may or may not be on the line of scrimmage, so it is unwise to tell players who to block, but better yet give them a hard and fast rule on where to block instead.  Base blocking is a very simple block to imitate in practice by the use of such drills as King of the Boards (figure 10-3), or the chase linebacker drill  (figure 10-4).  These drills, though basic in nature, will solidify the principle of base blocking.

Figure 10-3 (King of the boards drill)

Figure 10-4 (Linebacker chase drill)

       Veer blocking is a block that will called upon by the flexbone offensive lineman quite often, because of the direct nature of an option offense and the need to not block certain defenders.  When executing a veer block, the offensive lineman will do very similar to the technique employed by defensive linemen when they utilize the rip technique.  The offensive lineman, will step with the foot opposite of the direction play and then take an elongated second step, turning the shoulders and dipping the outside arm to the ground in an attempt to get skinny and not make contact with a defender on the line of scrimmage.  The lineman will then use the rip technique to drive their arm up through any contact that may be made by a defender aligned over them or to the outside and attempt to get the shoulders back square and replace the defender (figure 10-5).  It is of the utmost importance that the veer blocking lineman, not allow themselves to be moved or washed down the line of scrimmage when executing this technique.  This washing technique is utilized by defenders in hopes of having a linebacker or secondary player run free by utilizing a two-for-onementality.  When the defense can play two-for-one the impact of the triple option is greatly reduced, if not negated.

Figure 10-5 (Veer block, replacing the defender)

       Loop blocking is similar to veer blocking, in that the offensive lineman will try to elude the defender aligned over them, however instead of stepping away from the direction of the play, the offensive lineman will step in the direction of the play.  The steps for the loop block are exactly the same as the veer block, except that the lineman will step with the play side foot, use the rip technique and then attempt to get the shoulders back square as they go to block a second, or third level defender (figure 10-6). 

Figure 10-6 (Loop block)

       Scoop blocking is very similar to the traditional inside zone block.  The lineman will step with the play side foot and attack their aiming point in an attempt to engage the defender and maintain the block for the duration of the play.  The lineman has a simple rule, they will block anything that crosses their path in an area that goes from their nose, to the nose of the next offensive player in the direction they are blocking (figure 10-7).  If the defender, stunts away from the offensive lineman's path, the lineman does not block this defender, yet merely gets a hand on them to allow the next offensive lineman to overtake the defender.  Scoop blocking is more common on the back side of plays, than the front side, however certain plays in the offense do require that the front side players also scoop block.


Figure 10-7 (Scoop block reads)

       The double team block is one that occurs quite often, and sometimes goes hand-in-hand with veer blocking.  Each offensive lineman will step in the direction of the defender to be blocked.  The idea here is that both offensive lineman will weld their hips together as they attack their respective aiming points, which is usually the near shoulder or near number.  As these lineman come together, they are to get hip-to-hip and work to drive this defender off of the ball and into the next level, blocking any second level defender with the defender they double teamed.  Some coaches teach this block where one player is to come off at some point and block the second level defender.  The preferred method, is to block this second level defender with the initial push of the double teamed defender.  The only time an offensive lineman will leave a double team is once the block has moved to the second level and the offensive lineman can clearly disengage the first level defender.  This is a key component to double teaming a defender, as many times when a lineman leaves the first level defender, the double team block breaks down, and the first level defender has a chance to make the play for a minimal gain.  By securing the first level defender, and altering the second level defender's path to the ball, whether blocked or not, the play now has a greater chance of gaining positive yardage, than if the double team was not allowed to fully develop.
       The triple team, is also very similar to the double team in that movement of the first level defender is paramount, however there are now three components to the block instead of two.  In a triple team block, as illustrated in figure 10-8, there is a point blocker, and two supporting blockers.  The point blocker is the blocker who has the first level defender aligned over them once the ball is snapped.  This blocker will execute a normal base block, attacking their normal aiming point as if there were no help on the play.  The support blockers will take a step with the foot closest to the defender they are to triple team, and just like with the double team, the three offensive lineman will attempt to weld their hips together.  By getting the hips together, there is little chance the defender can split the block and get any penetration.  As with the double team, the triple team block should look to block second level defenders with the body of the first level defender.  The unique point about the triple team block, is that a blocker can come off quicker to block a second level defender than if the block were a double team.  This is due to the nature of the block having an extra blocker involved and allows for the point blocker to better gain control of the defender, quicker than they would had the block been a double team.

Figure 10-8 (Triple team block)

       The fan block is a type of block that is only used on certain plays, but is best defined as a block that requires a blocker to block a defender that is one full man in the direction of the play.  The midline play is one play where this type of block is required in the flexbone offense.  On the fan block, the offensive lineman will step with the play side foot and attack the near shoulder of the defender in an attempt to wall off this defender.  The idea here is that it is okay if the defender gets up field penetration, just do not let this defender fall back in on the play (figure 10-9).

Figure 10-9 (Fan block)

       Pulling involves having a lineman remove themselves from their current position and lead a play, usually to the outside.  An example of this can be found in Chapter Seven under the play Rocket Toss.  In this play, the play side guard will pull out and around the formation to help cutoff backside pursuit.  When pulling, a lineman will open with the play side foot, pointing down the line of scrimmage, and use the back foot to push and gain ground.  The chest remains over the thigh on the first step, much as the blocker would do when executing the normal initial step.  The play side arm of the blocker should rip open quickly as the blocker throws this arm towards the play side hip, in an attempt to get the shoulders to open up and now be perpendicular to the line of scrimmage (as shown in figure 10-10).  Once the blocker has opened up and is running down the line of scrimmage, they must read where the first opening is, and look to turn up in this opening.  When they turn up, the blocker should read the defense looking inside to outside for the first opposite colored jersey to show.  When this defender shows, the blocker should attempt to step on his toes as he blocks the defender in space.  The offensive lineman does not need to make a vicious, or overpowering block here, they simply need to put their body between the defender and the ball carrier.

Figure 10-10 (Pull technique)

Backside Blocks
        Backside blocks in the flexbone offense are of the following types:
Scoop
Trap/Log
The trap block can be executed by a tackle or guard depending on how the coach wants to block this type of play.  Trap blocking involves the offensive lineman opening in the direction of the play, by turning their first step either perpendicular to the line of scrimmage, or slightly into the line of scrimmage.  The blocker then pushes off of the back foot and heads into the line of scrimmage looking to block an unblocked first level defender coming across the line of scrimmage.  The blocker should attempt to get their head on the up field shoulder of the defender as well as having their up field hand on the back or hip of the defender to prevent this defender from falling back in on the play. 
With defenders being taught the wrong-arm or spill technique, trap blocking has become increasingly more difficult.  This is where the log block comes into play.  The log block is simply where a trap blocking offensive lineman, will work for outside, instead of inside leverage on the trap defender.  What this does, is basically take the defender and use their momentum against them, and attempts to washthem down inside opening up a run lane outside of the defender’s position.  The blocker should execute the log block exactly like the trap scheme, however upon contact, the blocker should work the head and hands into an outside position on the defender, as shown in figure 10-11.  Once outside leverage has been made, the blocker will now move their feet in an attempt to wash the defender down inside and create an opening in the defense.

Figure 10-11 (Log block)

Pass Blocking
Although not a staple of the flexbone offense, the flexbone offensive lineman is not unlike any other offensive lineman in that they need to be able to protect the passer and be proficient in the various pass protection schemes within the offense.  There are three basic protections in the flexbone offense as discussed in Chapter Eight, and these are as follows:

Slide
Big on Big
Turn back

The technique utilized by the offensive lineman varies between the protections, so in this section the technique for each type of protection will be broken down.
       Good pass protection involves that a lineman does not get their head too far forward, and this must be stressed in individual pass protection drills.  The lineman, should utilize their normal stance, however they may shift a bit of their weight back on their heels if in Big on Big (BOB) protection. 
       For slide protection, the lineman is only focused on knocking the defender back off the ball in an attempt to stun the defender's rush, and to give the appearance to second and third level defenders of a running play.  The offensive lineman can maintain a normal stance, and on the snap, fire off the ball in a manner consistent with that of a run block.  The lineman should step in the direction of their respective gap with the corresponding foot, as shown in Figure 10-12.  The lineman will deliver a controlled blow to the defender and drive the defender backwards for two steps.  Any more than two steps, and the lineman could be called for an ineligible receiver downfield.  A lineman that is uncovered should also fire out the standard two steps, again to give the defense the perception of a run play.  The ball should be away by the time the defender has a chance to react to the pass, so the lineman needs little in the way of pass protection technique after the initial blow has been delivered, however it is wise to teach the players that once the second step is met, then regular pass protection techniques can take over. 

Figure 10-12 (Slide protection)

       In big on big or BOB protection, the lineman will use a slightly more passive approach to protecting the quarterback.  The lineman should put be in a more balanced stance than their normal stance, with less weight out on the down hand.  On the snap, the lineman should push off with the down hand, and pop their head and shoulders back in a rapid, single motion.  The lineman, should attempt to bull the head and neck back as far as possible so that they may still see their defender, yet keep the head out of the block.  The hands should also come up in this first step and be in a cocked, coiled, ready to strike position.  The back should be straight, and there should be no forward body lean (see figure 10-13).  Forward body lean is what gets an offensive lineman beat when protecting the quarterback.  The lineman should look as though they are sitting in a chair once they have popped out of their stance.

Figure 10-13 (Proper pass protection technique)

 The footwork for BOB protection is very simple.  The lineman should drop their outside foot, keeping the shoulders square to the line of scrimmage.   Another area lineman get beat is by turning their shoulders, allowing an easy inside move for a defender.  As the defender approaches, the lineman should strike a controlled blow to the near peck of the defender in an attempt to stymie the rush.  Once this blow is delivered the lineman must now read the rush of the defender. 
       If the defender is on a hard charge, the offensive lineman, should sink the buttocks, lock the hands on the chest pad of the defender and actually sit down in order to slow the rush.  The offensive lineman does not want to be pushed back into the quarterback, so he must slow this bull rush technique in a manner that slows the defender, yet keeps the head and shoulders out of the block.  Once this initial charge has been stopped the lineman should now be ready for the defender to make a counter move such as a rip, swim, push-pull, or spin.
       If the defender comes off the ball hard, and makes a rip move (figure 10-14), the offensive lineman should leave the near hand on the defender's near pectoral muscle, while sliding the off hand down to the defender's hip area.  Once the hands are in place, the offensive lineman should push back in the direction the defender came from with the near hand, while pushing in the opposite direction with the off-hand.  This hand placement and push technique should create quite a discomforting twisting motion of the upper body of the defender.  Once the hands are in place, the offensive lineman can now turn his shoulders in an attempt to run the defender by the quarterback.

Figure 10-14 (Rip move)

       The swim move is defeated in a similar manner to that of the rip move, in that it is done with proper hand placement.  When the offensive lineman recognizes the move, they should again, leave the near hand in its original position on the near peck of the defender.  The off-hand should now come off and attempt to grasp the forearm area of the defender.  The feet should keep shuffling in order to keep leverage on the defender, and the off-hand should continue to push the defender in an attempt to get the defender off balance. 
       The push-pull move is one of the deadliest moves a pass rushing defender can utilize because of the quickness in which the move happens.  The push-pull is a very deceptive move in that the move appears to mimic a bull rush, but once the defender has made contact and gotten a hold of the lineman the snatch the lineman in one direction or the other in an attempt to clear the blocker on their way to the quarterback.  The key to stopping the push-pull is that the offensive lineman not allow the defender to get their hands in proper position to grab the offensive lineman.  The defender is taught to get the hands inside and extend and then snatch the offensive lineman.  The push-pull move cannot be initiated if the hands of the defender never reach their mark, or the hands are removed before the defender can execute the snatch portion of the move.  The technique utilized by the offensive lineman is quite simple, if the defender does get their hands into the chest of the offensive lineman, they may use either a downward chopping motion, or an uppercut motion to free themselves from the grips of the pass rusher.  This move is down by releasing the defender and then either slapping the hands downward, or ripping the hands upward through the forearms of the defender.  Once free, the offensive lineman should reset and be ready to deliver another blow to the rusher.  A key defeat point of the push-pull move is that the blocker gets their head and shoulder too far forward and into the defender, allowing the defender to use the blocker's weight and lack of momentum against them.   For this reason, it is imperative that the pass blocker keep their head and shoulder back at all times.
       The spin move is another move utilized by pass rushing defenders, however this move is not all that hard to defeat.  The spin move is usually fairly easy to spot due to the lack of contact that a defender will make prior to executing the spin.  Once the offensive lineman feels the spin move being executed, they should push off the defender and slide the foot nearest the defender back quickly to regain leverage on the defender.  As the defender has their back turned to the blocker, the blocker can execute short choppy pops to the back and kidney area of the rusher.  The key here, is dropping and resetting on the spinner.  If the blocker does not get enough depth, then the spin will roll right off of their near arm and shoulder and the defender will now be past the blocker and on their way to a sure sack.
       When utilizing turn back protection, the technique is no different than BOB, only the initial steps are different.  The offensive lineman should take a step, similar to that of when they execute a scoop block on their first step.  Once the play side foot is in the ground, the blocker will now pivot off that play side foot, and drop the backside foot, so that now the shoulders are perpendicular to the line of scrimmage.  Once this initial footwork is complete, the blocker can execute the normal pass protection as described prior.  The key to winning with turn back protection is that the lineman must understand they cannot lose a defender to their up field shoulder.  The rule here is always make the pass defender go around the blocker and through the backfield to get to the quarterback.  The quarterback will be sprinting away from this rush, and the defender's efforts are negated (see figure 10-15).

Figure 10-15 (Turn back protection, correct and incorrect)

       In all pass protection schemes as with any scheme for that matter, footwork is essential.  When involved in pass protection the offensive lineman cannot allow their feet to ever be less than shoulder width apart.  Nor should the offensive lineman ever stop their feet when blocking a pass rushing defender.  The feet should be kept moving, and all weight should be on the heels so that the blocker's weight cannot be used against them, as when a defender executes a pass rush move, such as the push-pull. 

       This is not meant to be an end-all-be-all guide to how to block in the flexbone offense, yet more of  a starter's guide.  With the advent of vertical set pass protection and other styles of blocking techniques the sky is the limit when it comes to teaching the techniques of blocking in the flexbone offense.  The key here is proper technique that can be taught clearly to the players, and executed without fail by the players.  The offensive line is by far the most important unit on the field in anyoffense, and the flexbone is no different.  The head coach or offensive coordinator that does not see that the offensive line is coached properly, will surely fail at whatever offense they so choose to run.

Duece